2 DELICIOUS SALSAS!! my EVERYDAY SALSA How to make POZOLE SALSA ❤

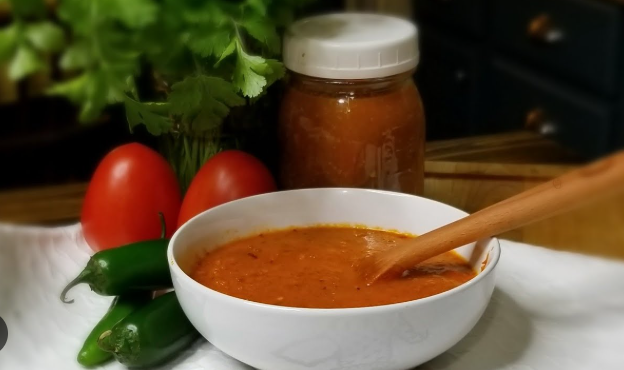
Here are two everyday Mexican salsas you’ll want to keep on hand: a fresh, vibrant Salsa Roja (the “everyday” cooked tomato salsa that’s perfect with eggs, tacos, or chips) and a smoky, bold Salsa para Pollo (the chile de árbol salsa that adds the perfect kick to chicken, rice, or anything grilled). Both are simple, made with pantry staples, and taste far better than anything from a jar. The first keeps beautifully in the fridge for up to a week; the second is bolder and spicier—use less chile de árbol if you prefer milder heat.
1. Everyday Salsa Roja (Cooked Tomato Salsa)
Ingredients
- 4 Roma tomatoes
- 4 serrano peppers (or 3 serrano + 1 jalapeño for extra kick)
- ¼ small onion
- 2 garlic cloves
- Salt to taste
- ¼–⅓ cup water (for blending)
- 1–2 tablespoons neutral oil (for cooking)
Instructions
- Bring a medium saucepan of water to a boil. Add the tomatoes and peppers. Boil 5–7 minutes until the tomato skins start to loosen and the peppers soften. Remove and let cool slightly.
- Peel off most of the tomato skins (they should slip off easily). Remove the stems from the peppers.
- In a blender, combine the tomatoes, peppers, onion, garlic, salt, and a splash of water. Blend until mostly smooth (leave a little texture if you like).
- Heat 1–2 tablespoons oil in a skillet over medium heat. Pour in the blended salsa and cook, stirring often, for 10–15 minutes until it thickens slightly and the raw taste cooks out. Taste and adjust salt.
- Let cool completely, then store in a clean jar or container in the refrigerator. Use within 5–7 days.
Serving Ideas Perfect with huevos rancheros, breakfast tacos, quesadillas, chips, grilled meats, or drizzled over rice and beans.
2. Salsa para Pollo (Smoky Chile de Árbol Salsa)
Ingredients
- 3 Roma tomatoes
- ½ small onion
- 10–15 dried chile de árbol (adjust for heat; start with 10 for milder)
- ¼ teaspoon dried oregano
- ¼ teaspoon ground cumin
- 3 garlic cloves
- Salt to taste
- Freshly ground black pepper
- 1–2 tablespoons neutral oil (for toasting)
- Water as needed for blending
Instructions
- Heat 1–2 tablespoons oil in a skillet over medium-low heat. Add the dried chile de árbol and toast gently for 1–2 minutes, tossing constantly so they don’t burn (they should become fragrant and slightly darker). Remove and set aside.
- In the same skillet, add the onion and cook until lightly golden and toasty. Add the garlic and cook 30–60 seconds until fragrant.
- Add the tomatoes and cook 2–3 minutes until they start to soften.
- Transfer everything to a blender: the toasted chiles, onion, garlic, tomatoes, oregano, cumin, salt, pepper, and a splash of water. Blend until smooth (add a little more water if needed for consistency).
- Taste and adjust salt. For a smoother, milder sauce, you can strain it, but most people leave it rustic.
- Store in a jar in the refrigerator. It keeps well for up to a week and actually tastes better after a day as the flavors meld.
Serving Ideas Excellent with grilled chicken, pollo asado, tacos, rice, beans, or as a dipping sauce for tortilla chips. A little goes a long way!
General Tips for Both Salsas
- Always taste as you go and adjust salt—canned or fresh ingredients vary.
- For the roja salsa, cooking it extends shelf life and mellows the raw tomato taste.
- For the chile de árbol salsa, toasting the dried chiles first brings out their smoky, nutty flavor—don’t skip this step.
- Use plastic or wooden spoons when serving from the jar to avoid metallic taste (as mentioned in the original video).
- Both salsas freeze well—portion into small containers or ice cube trays for easy use later.
These two salsas will quickly become staples in your kitchen. The roja is bright and versatile for everyday meals, while the chile de árbol salsa adds that signature smoky heat that makes pollo, tacos, and rice sing.
Let me know how yours turn out! Which one did you try first, or did you adjust the heat level? Share a photo or tell me what you paired them with—I’d love to hear! Happy cooking!

